
Why You’ll Fall in Love With This Recipe
Key Ingredients for Perfect Cookies
Using quality ingredients makes a noticeable difference in your baking. Here’s what you’ll need, and why each component matters.
➤ Dry Ingredients:
All-Purpose Flour: 2 1/4 cups (281 grams) measured by spooning and leveling. This provides the structure. For a slightly softer cookie, you can replace 2 tablespoons of flour with cornstarch.
Baking Soda: 1 teaspoon. Our leavening agent for the perfect lift.
Fine Sea Salt: 1 teaspoon. Salt is non-negotiable, it balances the sweetness and makes the chocolate flavor pop.
➤ Wet Ingredients & Fats:
Unsalted Butter: 1 cup (2 sticks or 226 grams), browned and cooled. Browning the butter is a secret weapon. It creates a deep, nutty aroma and flavor that makes these cookies truly unforgettable.
Granulated Sugar: 3/4 cup (150 grams). Adds sweetness and helps with spreading and browning.
Dark Brown Sugar: 3/4 cup (150 grams), packed. The moisture from the molasses in brown sugar is key for that coveted soft, chewy texture.
Large Eggs: 2, at room temperature. They bind everything together.
Pure Vanilla Extract: 2 teaspoons. Use the real stuff for the best fragrance.
➤ Mix-Ins & Finish:
Semi-Sweet Chocolate Chips: 2 cups (340 grams). You can use chips or chopped bar chocolate for pools of melted goodness.
Flaky Sea Salt: For sprinkling after baking, optional but highly recommended.
How to Make Heart Shaped Chocolate Chip Cookies
This method walks you through browning butter, making the dough, and the simple hand-shaping technique that creates the heart shape. It’s easier than you think.
Step 1: Brown the Butter
Place the unsalted butter in a light-colored saucepan over medium heat. Melt it, then continue to cook, swirling the pan often. It will foam and crackle. Watch carefully for small, golden brown specks (the milk solids) to form at the bottom and the butter to smell wonderfully nutty. This takes about 5-7 minutes. Immediately pour it, including all the brown bits, into a large heatproof bowl. Let it cool for 25-30 minutes until it’s no longer hot to the touch but still liquid.
Step 2: Combine Dry Ingredients
While the butter cools, whisk together the all-purpose flour, baking soda, and fine sea salt in a medium bowl. Setting this aside now means one less step later and ensures even distribution of the leavener.
Step 3: Cream the Sugars and Butter
To the bowl of cooled brown butter, add both the granulated and dark brown sugars. Using a hand mixer or stand mixer fitted with the paddle, beat on medium speed for a full 1-2 minutes. The mixture will become thick, glossy, and well-combined. This step helps create a chewy cookie. Add the room temperature eggs one at a time, beating well after each addition. Beat in the vanilla extract.
Step 4: Incorporate Dry Ingredients and Chocolate
With the mixer on low, gradually add the flour mixture, mixing just until a few dry streaks remain. Avoid overmixing. Use a sturdy spatula to fold in the chocolate chips by hand, ensuring they are evenly distributed throughout the soft dough.
Step 5: Chill the Dough
Cover the bowl and chill the dough for at least 1 hour, and up to 48 hours. Chilling is crucial as it allows the flavors to meld, the flour to hydrate, and prevents the cookies from spreading too flat in the oven. For a deeper flavor, I highly recommend a 24-hour chill.
Step 6: Portion and Shape the Hearts
Preheat your oven to 375°F (190°C). Line two baking sheets with parchment paper. Using a standard cookie scoop (about 1.5 tablespoons), portion out dough balls. Roll each one smoothly between your palms.
➤ Here is the magic for how to make heart shaped cookies (no cutter). Take a dough ball and gently roll it into a short, fat log, about 2 inches (5 cm) long. Place it on the baking sheet. Using the side of your thumb or the blunt end of a chopstick, press deeply into the top center of the log to create an indentation. This will become the dip of the heart. Then, use your fingers to pinch the bottom of the log to form the point of the heart. You’ve just shaped a perfect heart.
Step 7: Bake to Perfection
Bake one sheet at a time for 8-10 minutes. The cookies are done when the edges are set and golden, but the centers still look soft and puffy. They will continue to set as they cool. If you love a gooier cookie, lean toward 8 minutes. For crispier edges, go for 10. Immediately after pulling them from the oven, you can press a few extra chocolate chips into the tops and sprinkle with a pinch of flaky sea salt.
Step 8: Cool and Serve
Let the cookies cool on the baking sheet for 5 minutes. This allows them to firm up enough to transfer. Then, move them to a wire rack to cool completely, or enjoy warm when the chocolate is blissfully molten. The heart shape will hold beautifully.
Tips for Cookie Success
➤ Weigh Your Flour: For absolute consistency, use a kitchen scale. Too much flour is the most common cause of dry, cakey cookies.
➤ Room Temperature Eggs: They incorporate into the butter and sugar much more evenly, creating a better emulsion.
➤ Don’t Skip the Chill: This step prevents spreading and guarantees the perfect texture. If you’re in a rush, you can pop the shaped hearts on the tray into the freezer for 15 minutes before baking.
➤ Even Baking: Rotate your baking sheet halfway through the bake time if your oven has hot spots.
➤ Parchment is Key: It prevents sticking and makes cleanup effortless.
Fun Variations to Try
This dough is a fantastic base for creativity. Consider folding in 3/4 cup of chopped toasted pecans or walnuts with the chocolate chips. For a festive look, use pink and red M&M’s or holiday sprinkles. A teaspoon of orange zest added with the vanilla gives a wonderful citrus twist. If you adore a thick, bakery-style chocolate chip cookie, you can simply bake these as dough balls without shaping them into hearts.
Storing and Gifting Your Heart Cookies
Store completely cooled cookies in an airtight container at room temperature for up to 5 days. They also freeze beautifully for up to 3 months. To gift them, stack a few in a clear cellophane bag tied with a ribbon, or arrange them in a gift box lined with parchment. They are a heartfelt, homemade gift anyone would treasure.
Frequently Asked Questions (FAQs)
1. Should I use baking soda or baking powder in this recipe?
The recipe specifically calls for baking soda. A few bakers reported a strong baking soda taste, which is often a sign that the baking soda is old or expired. For best results, ensure your baking soda is fresh it’s a good practice to replace it every 6 months. Using baking powder will not yield the same texture.
2. How and when do I use the heart-shaped cookie cutter?
This is a key technique for this recipe. Unlike rolled sugar cookies, this dough is dropped by scoops and will spread into rounds while baking. You use the cookie cutter immediately after taking the hot cookies out of the oven. Carefully press the cutter into each warm, soft cookie to form the heart shape, then remove the excess scraps (a tasty perk for the baker!).
3. Can I use sea salt instead of regular salt?
You can, but be cautious. The author notes that sea salt typically has more sodium by volume than kosher or table salt. If you only have sea salt, it’s best to use a little less than the recipe states to avoid the cookies tasting too salty. Start with ½ teaspoon and adjust to your preference next time.
4. My cookies turned out dry or cakey. What happened?
The most common causes for dry cookies are over-measuring the flour or overbaking. Always spoon flour into your measuring cup and level it off, or ideally, use a kitchen scale for accuracy. The cookies are done when the edges are just golden but the centers look soft; they will continue to set as they cool on the sheet.
5. How do you get those beautiful “puddles” of melted chocolate on top?
For those photogenic chocolate pools, press additional chopped chocolate bar chunks (not just chips) onto the tops of the cookies right after they come out of the oven. The residual heat will melt them perfectly. Using a mix of chips and chunks in the dough also enhances this effect.
6. How should I store these cookies, and can I freeze them?
Store completely cooled cookies in an airtight container at room temperature for up to 5 days. You can also freeze the baked cookies for up to 3 months. To enjoy, simply let them thaw at room temperature.
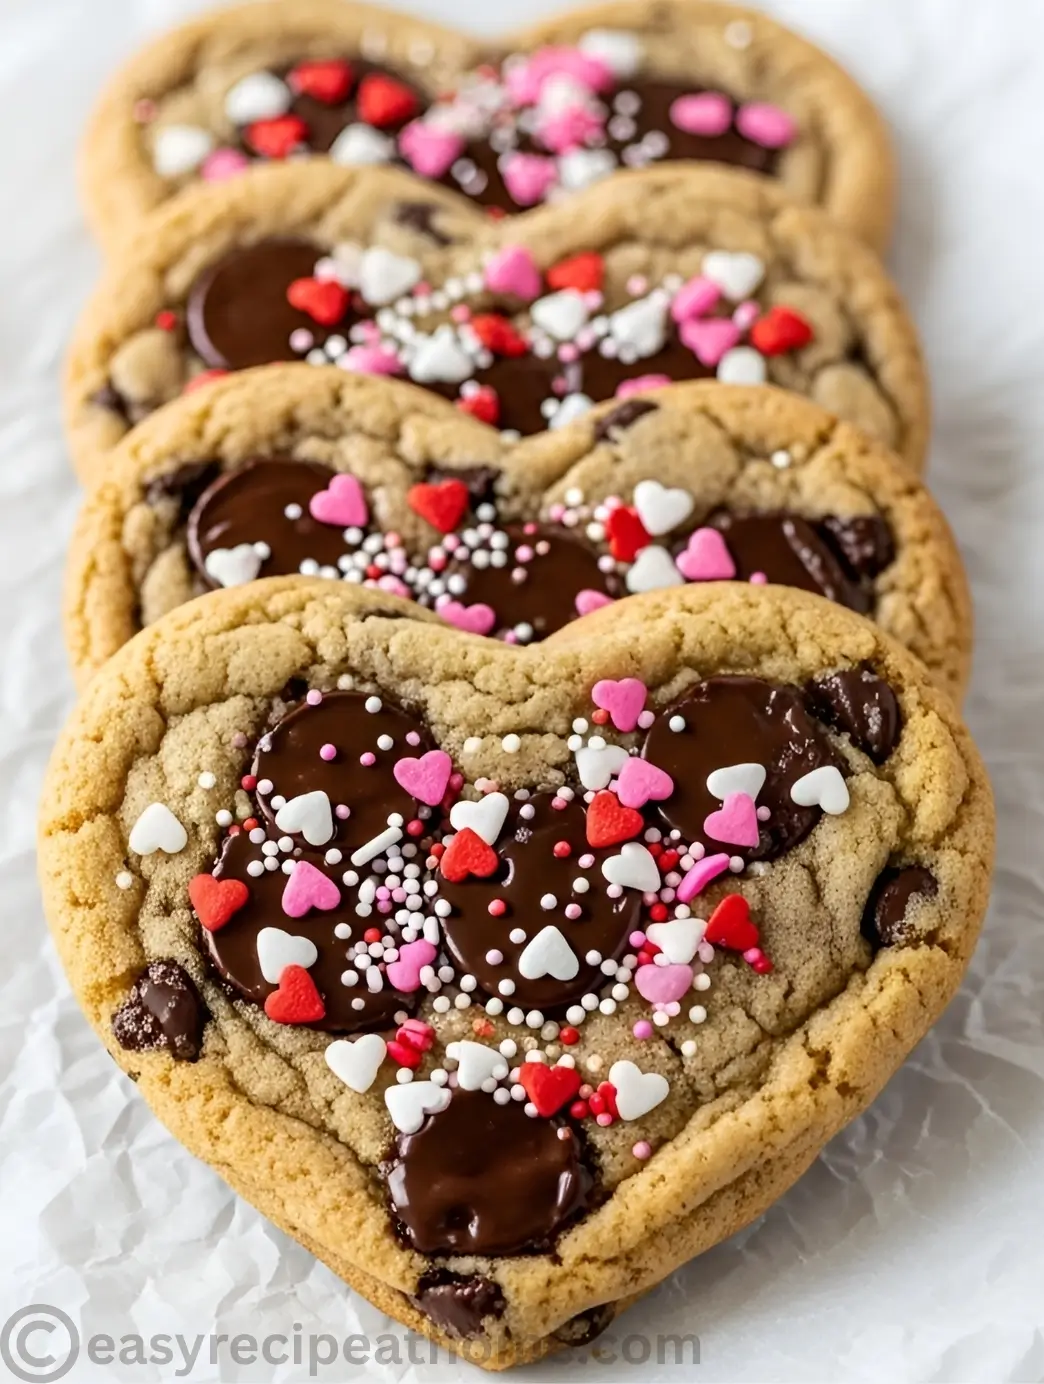

Heart Shaped Chocolate Chip Cookies (No Cutter)
Ingredients
Dry Ingredients
- 2 ¼ cups all-purpose flour approx: 281g
- 1 teaspoon baking soda approx: 6g
- 1 teaspoon fine sea salt approx: 6g
Wet Ingredients & Fats
- 1 cup 2 sticks unsalted butter, browned and cooled approx: 226g
- ¾ cup granulated sugar approx: 150g
- ¾ cup packed dark brown sugar approx: 150g
- 2 large eggs room temperature
- 2 teaspoons pure vanilla extract approx: 10ml
Mix-Ins
- 2 cups semi-sweet chocolate chips approx: 340g
- Flaky sea salt for optional garnish
Instructions
- Melt the unsalted butter in a light-colored saucepan over medium heat. Continue cooking, swirling the pan often, until the butter foams, turns golden, and releases a nutty aroma with brown specks at the bottom (5-7 minutes). Pour immediately into a large heat-proof bowl, including all the brown bits. Let cool for 25-30 minutes until no longer hot but still liquid.
- While the butter cools, whisk together the all-purpose flour, baking soda, and fine sea salt in a medium bowl. Set aside.
- Add the granulated and dark brown sugars to the cooled brown butter. Using a hand mixer or stand mixer, beat on medium speed for 1-2 minutes until thick and glossy. Beat in the eggs one at a time, then the vanilla extract, until fully combined.
- With the mixer on low, gradually add the flour mixture, mixing just until a few dry streaks remain. Use a spatula to fold in the chocolate chips by hand until evenly distributed.
- Cover the bowl and chill the dough in the refrigerator for at least 1 hour (up to 48 hours for deeper flavor).
- Preheat your oven to 375°F (190°C). Line baking sheets with parchment paper. Use a 1.5-tablespoon cookie scoop to portion dough. Roll each into a smooth ball.
- Roll a dough ball into a short, fat log about 2 inches (5 cm) long. Place it on the sheet. Use your thumb or a chopstick to press a deep indentation into the top center. Gently pinch the bottom of the log to form a point. You now have a heart shape. Repeat, spacing hearts 3 inches (7.5 cm) apart.
- Bake one sheet at a time for 8-10 minutes, until edges are golden but centers are soft and puffy. If desired, press a few extra chocolate chips on top and sprinkle with flaky salt as soon as they come out of the oven.
- Let cookies cool on the baking sheet for 5 minutes before transferring to a wire rack to cool completely.
Notes
- Chilling is Crucial: Do not skip chilling the dough. It prevents overspreading, improves texture, and allows the flavor to develop.
- Shaping Trick: If the dough gets too soft while shaping, pop the baking sheet with shaped hearts into the freezer for 5-10 minutes before baking. This helps the hearts hold their shape.
- Storage: Keep cooled cookies in an airtight container at room temperature for up to 5 days. Dough balls can be frozen for up to 3 months; bake from frozen, adding 1-2 minutes to the bake time.
- For More Ideas: Love chocolate desserts? Try our ultimate Fudgy Chewy Brookies for a brownie-cookie combo!
Calories: 215kcal | Carbohydrates: 26g | Protein: 3g | Fat: 12g | Saturated Fat: 7g | Polyunsaturated Fat: 0.5g | Monounsaturated Fat: 3g | Trans Fat: 0.3g | Cholesterol: 35mg | Sodium: 150mg | Potassium: 105mg | Fiber: 1g | Sugar: 16g | Vitamin A: 250IU | Calcium: 20mg | Iron: 1mg Disclaimer: The nutrition information provided is an estimate only and can vary based on the specific ingredients and brands you use. It is calculated using a third-party API and should be used for informational purposes.


I have been surfing online greater than 3 hours these days, yet I by no means
found any fascinating article like yours. It is pretty value sufficient
for me. Personally, if all web owners and bloggers made excellent content material as you probably did, the net will be a
lot more helpful than ever before.
Thank you 💗