The Best Peanut Butter Cookies Recipe: Soft and Chewy

Save & Share

There’s something magical about the aroma of peanut butter cookies baking in your oven. It fills your kitchen with a warm, nutty fragrance that promises comfort in every bite.

This recipe delivers exactly that cookies with soft centers, slightly crisp edges, and that unmistakable rich peanut butter flavor you remember from childhood.

No complicated steps, no fancy equipment, just pure cookie perfection in about 30 minutes. Whether you’re a seasoned baker or making cookies for the first time, this homemade peanut butter cookies recipe will become your forever favorite. Let’s get those mixing bowls ready!

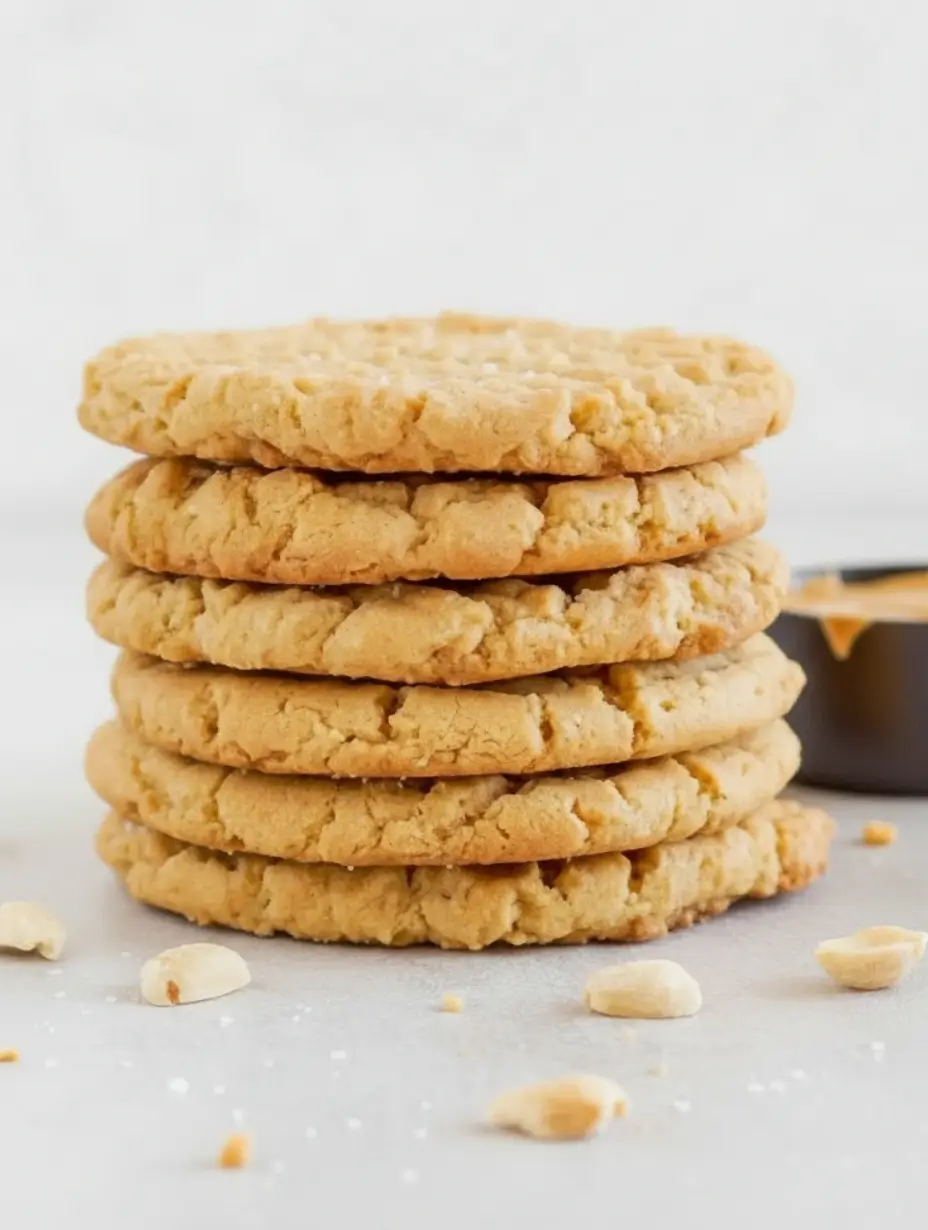
Why This Recipe Works Every Time

You deserve cookies that turn out perfectly batch after batch. This soft chewy peanut butter cookie recipe combines simple ingredients in just the right proportions. The balance of brown sugar and white sugar creates that ideal chewy texture, while using both baking soda and powder ensures the cookies rise beautifully without becoming cakey. And here’s the best part, there’s no chilling required, so you’re never more than 30 minutes away from warm, fresh cookies.

The Best Peanut Butter for Chewy Cookies

Creamy Peanut Butter (Shelf-Stable): Brands like Jif or Skippy work perfectly here. Their stable consistency ensures your cookies spread evenly and stay soft. The emulsifiers in these commercial butters create that tender, melt-in-your-mouth texture we’re after.

Natural Peanut Butter Note: If you love natural peanut butter for spreading on toast, save it for breakfast. Natural butters that separate can make your cookies dry and crumbly because the oil content behaves differently during baking. For reliable results with this chewy peanut butter cookies recipe, stick with the shelf-stable options.

Chunky Peanut Butter Option: Want extra crunch? You can absolutely use chunky peanut butter. Just add about ¼ cup extra to your recipe to account for the peanut pieces, and you’ll get delightful texture in every bite.

Essential Ingredients for Perfect Peanut Butter Cookies

Butter: One stick (½ cup or 113 grams) of unsalted butter, softened to room temperature. Real butter makes all the difference here, no substitutions with margarine or shortening if you want that authentic flavor and tender crumb. Peanut Butter: ¾ cup (about 195 grams) of creamy, shelf-stable peanut butter. This is the heart of your cookies, so use a brand you genuinely enjoy eating. Sugars: The combination of ¾ cup (150 grams) brown sugar and ¼ cup (50 grams) white granulated sugar creates the perfect chewy texture. Brown sugar adds moisture and that subtle caramel note, while white sugar helps the edges crisp slightly. Egg: One large egg, at room temperature, binds everything together and adds richness. Vanilla: 1½ teaspoons of pure vanilla extract elevates all the flavors. Avoid imitation vanilla if possible, pure extract truly makes a difference. Flour: 1⅓ cups (about 170 grams) of unbleached all-purpose flour. The unbleached flour gives these cookies a slightly denser, more satisfying texture than bleached flour. Leaveners: ¾ teaspoon baking soda and ½ teaspoon baking powder work together. The baking soda helps with spreading and browning, while baking powder adds a bit of lift. Sea Salt: Optional but highly recommended for sprinkling on top. That tiny crunch of salt against the sweet, nutty cookie creates magic.

How to Make The Best Peanut Butter Cookies

Step 1: Prepare Your Baking Station

Preheat your oven to 350°F (175°C). Line two large baking sheets with parchment paper. This simple step guarantees your cookies won’t stick and makes cleanup effortless.

Step 2: Cream the Butter and Sugars

Place your softened butter in a large mixing bowl. If you need to soften it quickly, microwave for about 20 seconds, just until soft but not melted. Add the brown sugar and white sugar, then beat until the mixture looks smooth and creamy. The aroma right now is already incredible.

Step 3: Add Peanut Butter, Egg, and Vanilla

Mix in the peanut butter until fully incorporated. Then add the egg and vanilla extract, beating until everything combines into a glossy, fragrant mixture. Stop to scrape down the bowl’s sides so everything incorporates evenly.

Step 4: Incorporate the Dry Ingredients

In a separate small bowl, whisk together the flour, baking soda, and baking powder. Gradually add this dry mixture to your wet ingredients, mixing on low speed or stirring by hand just until no flour streaks remain. Overmixing develops too much gluten, which can make cookies tough instead of tender.

Step 5: Shape Your Cookies

Scoop the dough into balls using about 2 tablespoons (about 30 grams) per cookie. Roll them gently between your palms and place them on the prepared baking sheets, spacing about 2 inches (5 cm) apart, they’ll spread slightly during baking.

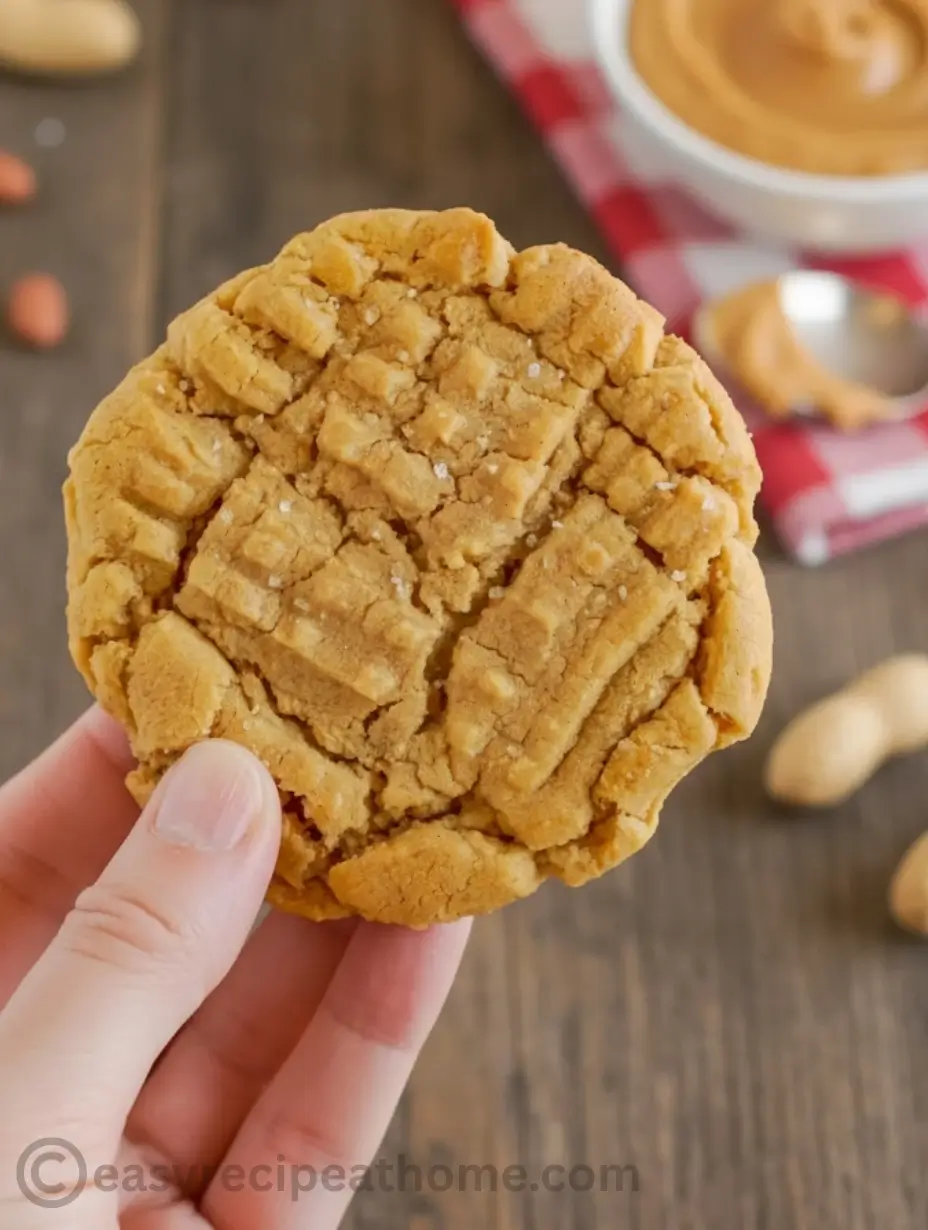
Step 6: Create Those Classic Fork Marks

Here’s where these cookies get their signature look. Dip a fork in granulated sugar (this prevents sticking), then gently press down on each dough ball. Press once in one direction, then press again perpendicular to create that classic crisscross pattern. This also flattens the cookies slightly so they bake evenly.

Step 7: Add the Finishing Touch

Sprinkle a tiny pinch of flaky sea salt over each cookie if you’re using it. This isn’t just for looks, that salt heightens every single flavor note.

Step 8: Bake to Perfection

Bake for 9-11 minutes. The cookies will look slightly puffy, pale, and maybe even a bit underdone in the center, this is exactly what you want. They’ll continue baking on the hot pan as they cool, setting into that perfect soft texture.

Step 9: The Crucial Cooling Step

Let the cookies rest on the baking sheet for 10-15 minutes. I know the waiting is hard, but this step is non-negotiable. Moving them too soon will cause them to break apart. After they’ve firmed up, transfer them to a wire rack to cool completely.

Secrets for Soft Chewy Peanut Butter Cookies Every Time

Measure Your Flour Correctly: Spoon the flour into your measuring cup and level it off with a knife. Scooping directly with the cup packs the flour down, leading to dry, dense cookies.

Don’t Overbake: Those slightly underdone-looking cookies when they come out of the oven are exactly right. They set up during cooling into that perfect chewy texture.

Room Temperature Ingredients Matter: Cold butter won’t cream properly, and a cold egg can cause the mixture to seize. Let everything sit out for about 30 minutes before starting.

Experiment with Mix-Ins: This basic peanut butter cookies recipe welcomes creativity. Fold in a handful of chocolate chips, chopped Reese’s cups, or even M&M’s for color and crunch.

Make Ahead and Storage Wisdom

Storing at Room Temperature: Keep your cookies in an airtight container at room temperature for up to 5 days. Place a slice of plain bread in the container to maintain softness, the cookies absorb moisture from the bread rather than drying out.

Freezing Baked Cookies: These freeze beautifully for up to 3 months. Layer them between sheets of parchment paper in a freezer-safe container. Thaw at room temperature for about 30 minutes, and they’ll taste almost freshly baked.

Freezing Cookie Dough: You can scoop the dough into balls, freeze them on a baking sheet until solid, then transfer to a freezer bag. Bake directly from frozen, adding 2-3 extra minutes to the baking time. Fresh cookies anytime you crave them!

Craving More Peanut Butter Chocolate Combinations?

If you love the classic pairing of peanut butter and chocolate as much as we do, you’ll absolutely want to try these Fudgy Chewy Brookies. They combine the best parts of brownies and cookies into one irresistible treat, perfect for when you can’t decide which dessert you want.

Frequently Asked Questions

Why did my cookies turn out dry and crumbly?
You likely used natural peanut butter that separates, or you measured your flour by scooping directly with the cup. Spoon and level your flour, and stick with regular peanut butter like Jif or Skippy for guaranteed moisture.
Can I reduce the sugar in this recipe?
Sugar isn’t just for sweetness, it provides moisture and structure. Reducing it significantly will change the texture dramatically. For slightly less sugar, you can reduce by 2 tablespoons total, but expect a denser cookie.
My cookies didn’t spread at all. What happened?
Either your dough was too cold (though this recipe doesn’t require chilling) or you added too much flour. Make sure your butter is properly softened and measure flour accurately next time.
Can I make these gluten-free?
Yes! Substitute the all-purpose flour with a 1:1 gluten-free baking flour blend that contains xanthan gum. The texture will be slightly different but still delicious.
Why do I need both baking soda and baking powder?
The baking soda helps the cookies spread and brown, while baking powder gives them a gentle lift. Using both creates that ideal texture, soft in the middle with slightly crisp edges.
How do I know when they’re perfectly baked?
Look for edges that are just starting to turn golden while the centers still look soft and slightly underdone. They’ll set up perfectly as they cool on the hot baking sheet.
Can I use this recipe for cookie bars?
Absolutely! Press the dough into a greased 9×13 inch (23×33 cm) pan and bake for about 15-18 minutes. You’ll have chewy peanut butter cookie bars that are perfect for sharing.
Side-angle close-up of a bitten chocolate chip cookie, revealing its soft, chewy interior and gooey streaks of melted chocolate. The focus is on the cookie's perfect homemade crumb structure

The Best Peanut Butter Cookies Recipe: Soft, Chewy & Classic

A simple chewy peanut butter cookies recipe made with basic ingredients for a soft, sweet, and irresistible homemade dessert.
Prep Time 20 minutes
Cook Time 12 minutes
Total Time 32 minutes
Course Dessert, Snack
Cuisine American
Servings 18 cookies
Calories 285 kcal

Ingredients
  

  • 1 cup (2 sticks) Unsalted Butter (approx. 226g) for browning
  • ¾ cup Granulated Sugar (approx. 150g) helps create crisp edges
  • 1 cup packed Light Brown Sugar (approx. 200g)
  • 2 large Eggs (approx. 100g total) room temperature
  • 2 teaspoons Vanilla Extract (approx. 10ml)
  • 2 ¼ cups All-Purpose Flour (approx. 280g)
  • 1 teaspoon Baking Soda (approx. 5g)
  • 1 teaspoon Fine Sea Salt (approx. 5g)
  • 2 cups Semi-Sweet Chocolate Chips (approx. 350g) or mix with chopped chocolate bar for variety

Instructions
 

  • Place the butter in a light-colored saucepan over medium heat. As it melts, it will begin to foam. Swirl the pan occasionally. After 5-8 minutes, you will see golden brown specks form at the bottom and smell a nutty, irresistible aroma. Immediately remove it from the heat and pour it into a large heatproof mixing bowl (including all the brown bits). Let it cool for 10-15 minutes.
  • To the bowl with the cooled brown butter, add both the granulated sugar and brown sugar. Whisk vigorously until the mixture looks smooth and combined, about 1 minute. Add the eggs, one at a time, whisking well after each addition until the dough is glossy and smooth. Finally, whisk in the vanilla extract.
  • In a separate, medium bowl, whisk together the all-purpose flour, baking soda, and fine sea salt. This ensures the leavening and salt are evenly distributed throughout the dough.
  • Pour the dry ingredients into the wet ingredients. Using a rubber spatula, gently fold the mixture together. Stop mixing as soon as you no longer see streaks of flour overmixing will make the cookies tough. Fold in the chocolate chips and chopped chocolate, reserving a few chips to press onto the tops of the dough balls later.
  • For the thickest, most flavorful cookies, cover the bowl and refrigerate the dough for at least 30 minutes, or up to 72 hours. This allows the flavors to meld and prevents the cookies from spreading too thin.
  • When you are ready to bake, preheat your oven to 375°F (190°C). Line two large baking sheets with parchment paper.
  • Scoop the dough into generous balls, about 3 tablespoons (approx. 60g) each. Roll them gently between your palms they should be taller than they are wide. Place them on the prepared baking sheets, leaving about 3 inches (8 cm) of space between each for spreading. Gently press a few extra chocolate chips onto the top of each dough ball for a bakery-style look.
  • Bake one sheet at a time for 11-13 minutes. The edges should be beautifully golden brown, while the centers will still look slightly soft and puffy. They will continue to set up on the hot pan
  • Let the cookies cool on the baking sheet for 10-15 minutes. This step is crucial for the perfect chewy texture. After that, transfer them to a wire rack to cool completely, or enjoy one warm—you deserve it!

Notes

  • For the love of cookies, do not overbake. Taking them out when the centers are still soft guarantees a chewy result.
  • If you are short on time, you can bake the dough immediately, but the cookies will be slightly thinner. Still delicious, just different!
  • Love a salty-sweet combo? Sprinkle a tiny pinch of flaky sea salt on each cookie right after they come out of the oven.

Get updates on the latest posts and more from easy recipe at home straight to your inbox.

We use your personal data for interest-based advertising, as outlined in our Privacy Notice.

Did you try this recipe?

  • Pin It Now: Love this recipe? Hit the Save button and pin it to your favorite board! It’s the best way to keep your cooking inspiration organized and ready for your next meal.

  • Share Your Success: We love seeing what you create in your kitchen! Once you make this dish, come back and let us know how it turned out. Did you add a personal twist or substitution? Tell us your tips and results in the comments below!

  • Follow for More: Don’t miss out on daily inspiration and more cozy kitchen favorites! Follow us on my Pinterest – Easy Recipe At Home for quick, easy, and delicious recipes.

Leave a Comment & Rate this Recipe

Your email address will not be published. Required fields are marked *

Recipe Rating


Save & Share

About Me

Hello, I’m Clara

Follow Me

Popular Recipes

  • All Post
  • Appetizers
  • Breakfast
  • Cocktails
  • Desserts
  • Dinner Recipes
  • Drink Recipes
  • Soups and Stews
    •   Back
    • Cookies & Bars
    • Muffins & Cupcakes

Newsletter

Never miss a recipe!

Be the first to taste! We'll send our brand new recipes directly to your inbox before they even hit the blog.

Categories

Edit Template

About Me

I’m Clara, and I’m absolutely thrilled you’ve stopped by my kitchen. This isn’t just a recipe blog; it’s my personal mission to bring restaurant-quality flavors and techniques right into your everyday life

Email: co*****@**************me.com

Popular Posts

  • All Post
  • Dinner Recipes