Why You Will Love These Chocolate Cookies With Marshmallows
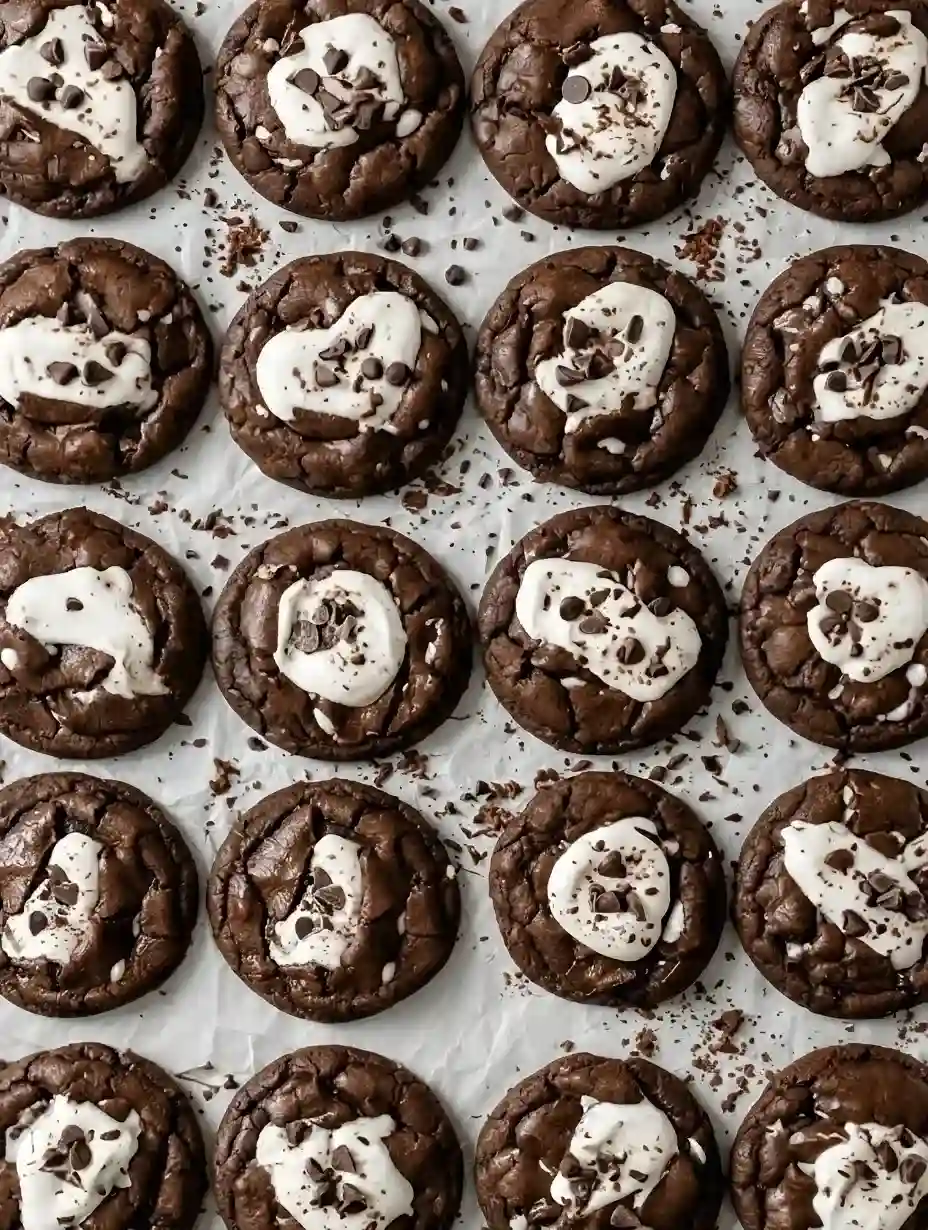
If you love a dense and dark chocolate base, this Chocolate Marshmallow Cookies Recipe is absolutely for you. The contrast between the bitter cocoa powder and the sugary fluff is completely addictive. The outer edges crisp up beautifully as they bake on the hot metal pan.
But the center stays incredibly soft, heavy, and melts right on your tongue. It reminds me of the thick, expensive treats you find in fancy gourmet bake shops. If you enjoy that specific dense texture, you will also fall in love with these bakery-style chocolate chip cookies.
They are also surprisingly simple to throw together on a whim. You do not need any complicated techniques or strange grocery items to make them happen. The wow factor comes entirely from how the ingredients melt together in the heat.
The Secret to Perfect Marshmallow Swirl Cookies
The real trick to perfect Marshmallow Swirl Cookies is using the right kind of marshmallow ingredient. Standard puffy marshmallows from the candy aisle melt into invisible sugar pockets when they hit high heat. They completely disappear into the dark dough and leave hollow, sticky craters behind.
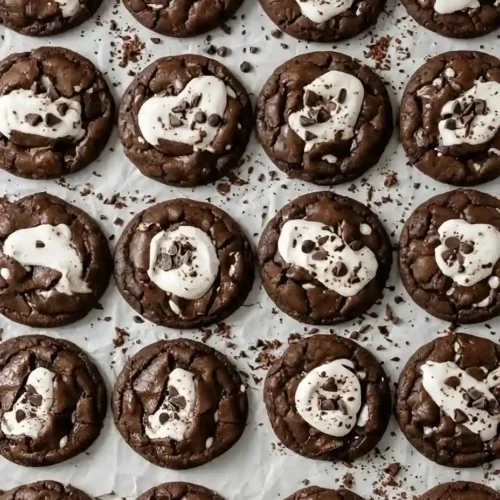
We use marshmallow creme, often called fluff, instead of whole marshmallows. The fluff stays thick and creates gorgeous, distinct white ribbons against the dark chocolate dough. You want those clear patches of sticky sweetness to stand out in every single bite.
It also keeps the interior of the cookie ridiculously soft for days after baking. The sticky creme traps the moisture inside the crumb structure beautifully. It is purely magical when you pull a warm one apart and see that white stretch.
Ingredients
Ingredients You Need for Homemade Chocolate Marshmallow Cookies
Let us gather what we need for these homemade chocolate marshmallow cookies. I highly recommend using a digital kitchen scale for the best and most consistent results.
-
All-purpose flour: This forms the basic structure of the cookie dough. You need 1 1/2 cups / 190 grams. Do not pack your measuring cup tightly, or your dough will turn out dry and crumbly.
-
Dutch-process cocoa powder: This gives the dough an intense, dark color and a smooth, earthy taste. You will need 1/2 cup / 45 grams. Regular cocoa works, but Dutch-processed brings a much richer, deeper chocolate profile.
-
Baking soda: This is our chemical leavening agent that helps the dough spread just a tiny bit. Use 1/2 teaspoon / 2.5 grams. It gives the outer edges that satisfying, slightly crisp snap.
-
Salt: A generous pinch of salt cuts right through the heavy sweetness of the fluff. Use 1/2 teaspoon / 3 grams of fine sea salt. It makes the dark chocolate flavors taste much stronger and more pronounced.
-
Unsalted butter: Butter provides the rich fat needed for a tender, soft bite. You need 1/2 cup / 113 grams, softened to room temperature. It should yield slightly when you press it gently with a clean finger.
-
Brown sugar: Light brown sugar brings intense moisture and a slight hint of caramel flavor. Measure out 1/2 cup / 100 grams, tightly packed into the cup. This ingredient is what keeps the cookie centers ridiculously soft.
-
Granulated sugar: White sugar helps the exterior crisp up properly in the hot oven. You will need 1/2 cup / 100 grams. The combination of both sugars creates the ultimate chewy and crisp texture profile.
-
Egg: One large egg binds the dry dough components together smoothly. Keep it at room temperature so it mixes seamlessly into the creamed butter. Cold eggs from the fridge can make your batter curdle, separate, and look lumpy.
-
Vanilla extract: A heavy splash of vanilla enhances the warm cocoa notes beautifully. Use 1 teaspoon / 5 ml of pure vanilla extract. It acts as a flavor bridge between the dark dough and the bright white fluff.
-
Marshmallow fluff: This sticky creme is the absolute star of our swirl technique. You need about 3/4 cup / 65 grams of the sticky stuff. It creates those beautiful, gooey white puddles right on top of your treats.
-
Chocolate chips: Semi-sweet chips add delicious pockets of melted chocolate throughout the dough. Use 3/4 cup / 130 grams. They provide a nice, firm textural contrast to the soft, cakey dough.
How To Make
How to Make Chocolate Marshmallow Swirl Cookies
Preparing these treats is a really fun, hands-on process. You will love the way the dark cocoa smells as it mixes with the sweet butter. Just follow these steps closely to get the perfect marbled effect.
-
Step 1
Mix the Dry Ingredients
Grab a medium mixing bowl and toss in your measured flour, cocoa powder, baking soda, and salt. Use a wire whisk to blend them until the mixture looks like soft, pale brown dirt. This crucial step breaks up any hard cocoa lumps before they ruin your dough.
-
Step 2
Cream the Butter and Sugars
In a large mixing bowl, beat the softened butter with both the brown and white sugars. Run your electric mixer on medium speed for about two full minutes. The gritty mixture should turn fluffy, light, and slightly pale in color.
-
Step 3
Add the Wet Ingredients
Crack your room-temperature egg straight into the fluffy butter mixture. Pour in the liquid vanilla extract right after it. Beat everything together for another minute until it looks perfectly creamy, glossy, and smooth.
-
Step 4
Combine Wet and Dry
Pour your bowl of dry cocoa ingredients directly into the wet butter mixture. Turn your mixer to the lowest possible speed so the flour does not fly everywhere. Stop mixing the very second you no longer see dry white streaks of flour.
-
Step 5
Fold in the Chips
Dump your semi-sweet chocolate chips directly into the dark, thick dough. Use a sturdy wooden spoon or a stiff rubber spatula to fold them in gently by hand. The dough will feel quite heavy, thick, and stiff at this stage.
-
Step 6
Create the Swirl
Now comes the messy and fun part for our chocolate swirl cookies. Drop heavy spoonfuls of sticky marshmallow fluff directly on top of your cookie dough.
Use a dull butter knife to gently fold and drag the white fluff through the dark dough. You want thick, distinct ribbons, so do not overmix it into a flat, gray paste.
-
Step 7
Chill the Dough
Cover your mixing bowl tightly with a piece of plastic wrap. Place it in the refrigerator for at least thirty minutes before baking. Chilling firms up the warm butter and keeps the marshmallow from melting instantly into a puddle in the hot oven.
-
Step 8
Scoop and Prepare
Preheat your oven to 350 degrees Fahrenheit / 175 degrees Celsius while the dough rests. Line a large, flat baking sheet with a sheet of parchment paper.
Use a large metal cookie scoop to drop mounds of dough onto the paper, leaving about two inches of breathing room between them.
-
Step 9
Bake to Fudgy Perfection
Slide the loaded baking tray into the middle rack of your hot oven. Bake them for about 10 to 12 minutes, watching them closely near the end.
The edges will look firm and set, but the marshmallow parts will bubble away wildly and look totally underdone.
-
Step 10
Let Them Set Completely
Pull the hot tray out of the oven very carefully. Let the soft treats sit directly on the hot metal pan for another ten full minutes. They will continue to bake slightly and firm up as the bubbling sugar cools down and sets.
Expert Tips
Expert Tips for the Best Chocolate Swirl Cookies
ImportantBaking Chocolate And Marshmallow Cookies can be a little tricky because of the incredibly sticky fluff. You absolutely must use parchment paper or a high-quality silicone baking mat. If you place the dough directly on a bare metal pan, the melted marshmallow sugar will weld itself to the metal permanently.
You will end up with a torn, messy disaster when you try to lift them off with a spatula. Another huge tip is to underbake them just a tiny fraction. You want the dark chocolate centers to look soft and glossy when you pull them out of the oven.
They will set up perfectly as they cool down on the kitchen counter. If you happen to love that super gooey, slightly underbaked texture, you definitely need to try these fudgy chewy brookies next. They deliver that same heavy, decadent chocolate experience.
Variations
Fun Variations on This Chocolate Marshmallow Cookies Recipe
This Chocolate Marshmallow Swirl Cookies recipe is highly adaptable to whatever you have in your pantry. You can easily add crushed graham crackers to the dough for a toasted, fireside campfire vibe. Just fold in a half cup of sandy graham crumbs when you add the chocolate chips.
You could also swap the semi-sweet chips for white chocolate chunks, butterscotch, or peanut butter chips. Peanut butter and sweet marshmallow are an incredible, nostalgic combination together. Speaking of classic flavors, keep this link handy for the best peanut butter cookies recipe soft and chewy.
If you want to make these for a special holiday or occasion, you can shape the dough slightly before baking. Pressing the dough mounds gently can yield fun, uniform results for gifting in decorative tins. Try pairing them with a fresh batch of heart-shaped chocolate chip cookies for a lovely, homemade dessert box.
Troubleshooting
Troubleshooting Sticky Dough Issues
Working with marshmallow creme can definitely test your patience if your kitchen is very warm. If you find the fluff is sticking to your hands and utensils too much, lightly spray your knife or spoon with non-stick cooking spray. This creates a slick barrier that helps the knife glide through the sticky creme.
If your swirled dough feels too loose and sloppy to scoop, just put the bowl back in the fridge. Letting it chill for an extra fifteen minutes works absolute wonders for the texture. The colder the dough is going into the oven, the thicker your final cookie will be.
Never Skip ThisNever skip the chilling step, even if you are in a massive rush. Warm dough spreads rapidly, turning your beautiful, thick treats into flat, crispy puddles. Patience during the chilling phase rewards you with that incredible bakery-style thickness.
Storage & Freezing
How to Store and Freeze Your Cookies
Storing your baked treats correctly keeps them incredibly soft and fresh for several days. Place the completely cooled cookies in an airtight plastic container or a large zip-top bag. Keep them sitting at room temperature on your counter for up to four days.
Should I refrigerate these cookies?
Do not put the baked cookies in the cold refrigerator. The chilled air will quickly draw out the moisture and turn the fudgy, soft crumb hard and completely stale.
If you want to stack them inside your container, place a sheet of wax paper between the layers. This stops the sticky marshmallow tops from gluing everything together into one giant block.
If you love having treats ready in the freezer for sudden cravings, this raw dough freezes wonderfully. Just scoop the swirled dough into round balls and freeze them solid on a flat plate for an hour.
Then transfer the rock-hard dough balls to a heavy zip-top freezer bag for up to three months. You can bake them straight from frozen whenever you want a warm treat, just add two extra minutes to your baking timer. For more brilliant freezer-friendly baking ideas, check out these slice and bake heart cookies.
Frequently Asked Questions
Frequently Asked Questions
Can I use regular marshmallows instead of marshmallow fluff?
I really don’t recommend it! Standard marshmallows tend to dissolve completely when baked or leave hollow, sticky craters behind. Marshmallow fluff stays thick and creates those beautiful, distinct white ribbons you want in every bite.
Why do I need to chill the dough before baking?
Chilling is an absolute must for this recipe. It firms up the warm butter and keeps the sticky marshmallow from melting into a flat puddle as soon as it hits the hot oven, ensuring your cookies stay thick and bakery-style.
How do I keep the marshmallow from sticking to the pan?
Always line your baking sheet with a piece of parchment paper or a high-quality silicone baking mat. If you bake these directly on a bare metal pan, the melted sugar will permanently weld itself to the surface!
Can I freeze the cookie dough for later?
Yes, this dough freezes wonderfully! Just scoop your swirled dough balls onto a plate, freeze them until solid, and then transfer them to a heavy-duty zip-top bag for up to three months. You can bake them straight from frozen, just add a couple of extra minutes to the timer.
How should I store the baked cookies to keep them soft?
Keep your completely cooled cookies in an airtight container on the kitchen counter for up to four days. Don’t put them in the fridge, or the cold air will turn the fudgy crumb hard and stale. If stacking them, place a piece of wax paper between the layers so they don’t stick together.
Serve Up the Ultimate Gooey Treat
Pulling a hot, fragrant tray of these sticky, sweet treats from the oven is pure joy for any baker. The amazing smell of toasted sugar and dark cocoa powder fills the entire kitchen instantly. It is the kind of baking aroma that brings everyone running into the room.
Grab a tall glass of ice-cold milk, tear a warm cookie right in half, and watch that beautiful white marshmallow string pull apart. The contrast of the dark, fudgy base and the airy, sticky swirl is absolute perfection. You are going to love every single messy, chocolatey bite.